
Having a Simstagram is super exciting: you get to know so many people, you can exchange ideas and experiences about your hobby, and you are (or at least I still am) blown away by the immense size and the incredible kindness of the community.
In order to get to know your possibilities in regards to presenting your work on Instagram, I am telling you my personal tips and tricks about taking screenshots, while having in mind that all of this is our hobby and should be fun.
Before that, I would like to remind you that I am not a pro, I am not a graphic designer like some other bigger Simstagrammers, I don’t know how to work with Photoshop or how to use Reshade or anything like that. I still use very basic tools because they work for me, and I would like to share them with you.
Builds
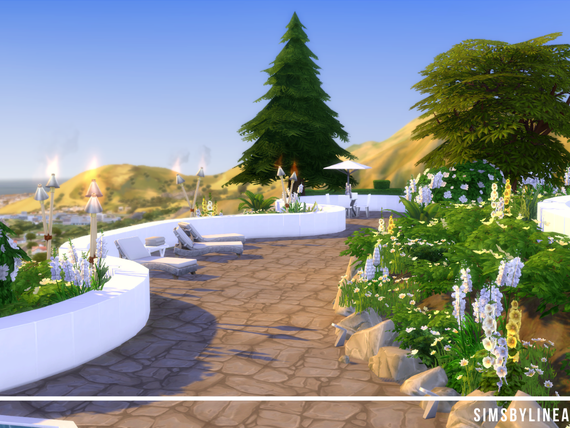
The goal when presenting builds online is to make them look like they are real buildings, or professional renderings, or drawings - short - make them look like they are not from the sims. I know, that sounds weird. But that's what I've been observing for the last one and a half years.
First, make sure your grid is turned off (press G on your keyboard) when you take screenshots in build mode. You can’t show off the aesthetic of the build correctly when there are ugly white lines all over the floor. You can simply take screenshots in game by pressing C on your keyboard. You can find the screenshots you took in your documents folder on your PC in: documents / Electronic Arts / Sims 4 / Screenshots
Secondly, and this is something I did „wrong“ for the first year or so of having my account, it looks better when you take your exterior screenshots in live mode, so the white lines of your lot don’t show. I find that houses look so much cooler when they are integrated in the surrounding landscaping.
A small tip from me is to take screenshots of the exterior in live mode, so you don’t have those white lines on the border of your lot, but take interior shots in build mode. The reason for that is that the lamps don’t become see-through / vanish when you zoom in when you are in build mode, and I personally like to play with perspectives in my screenshots. In build mode you can ensure that everything that is in the build will be shown in your pics.
In general, it is always a good thing to have a sim present on the lot when taking screenshots. Apart from being able to playtest the build, you can also just switch to live mode when taking pictures very easily.
In live mode, you can also access the cinematic camera by pressing Tab on your keyboard, to be able to take better screenshots. Controlling the cinematic camera is easy, using W, A, S and D on your keyboard to move forwards and sideways, Q and E to move up and down and moving your mouse to change your perspective. James Turner made a very good tutorial about it, which you can check out here.
There is also a mod that allows you to access the cinematic camera in build mode. It works just the same, and it is easier to switch to when you’re in build mode because you don’t have to change to live mode first. You can download the mod here.
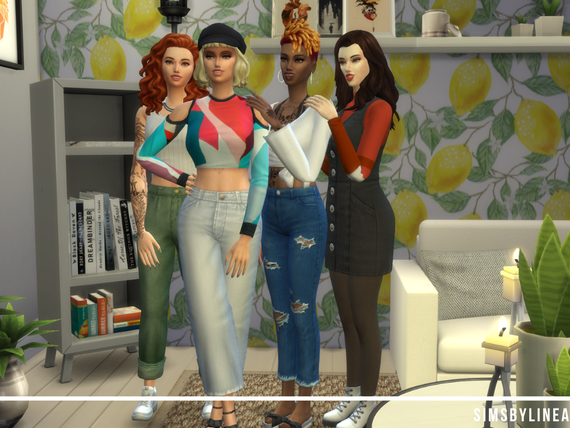
Sims
I would start off by saying that I don’t have a story account and I have little to no knowledge about poses. The only thing I know about them is that they exist, that you need a mod for them and that there are pretty good tutorials on them on YouTube. I used in game poses only once, for a CAS challenge I did. You can check out the post here, I think it turned out to look quite cute considering I don’t have any experience with it.
First off, I would recommend watching a few tutorials on YouTube on how to use poses and how to install them, like the ones here and here.
Then, after having installed the poses mod itself, it’s time to look for your poses. You can search for pretty specific ones in fact, there is almost anything out there you can imagine. My go-to websites are TSR and Tumblr. Poses are free to use, but please don’t forget to tag and mention the creator when posting pictures of them on Instagram or any other platform!
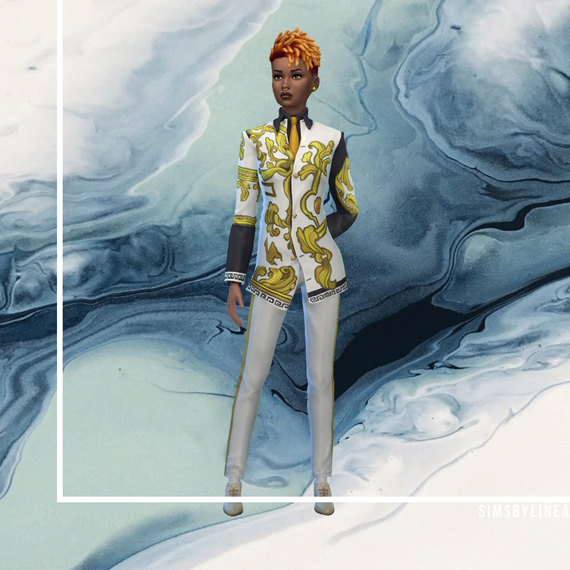
Create a Sim
Apart from showing them off in game, using some cute poses for family pictures for example, you can also take pics of your sims in Create a Sim mode. Taking screenshots of your sims when you have selected a certain aspiration or trait is a cute way to present them. Of course, there is the option of changing the backdrop and adding CAS poses. I love using backgrounds by KatVerseCC on TSR. She is also on Instagram and creates amazing custom content, especially poses for CAS and gameplay, as well as backgrounds for CAS and many more amazing things. You can download them just like any other piece of custom content and drag them into your mods folder.
The poses I use are from Remaron on TSR. They are trait poses, which means the movement your sim makes when you give them a certain trait will be changed to a row of poses your sim does. While they are in movement and change their position a few times, you can take your screenshots by pressing C.
That sums up my experience regarding taking pictures of all types of creations in the sims, which is, as I said, not professional in any way. Remember that nobody can know everything from the beginning and please bear in mind that I am not a professional either. If I have forgotten something or something isn’t clear, please let me know.
Make sure to check out my Instagram @simsbylinea as well as @something_simlish.
Write a comment
CokiCreative (Saturday, 26 September 2020 19:28)
There are great tips! This goes over a lot!